This is an old revision of the document!
Table of Contents
Meetnet Storage Data01
The data01 storage server (22 TB) and its backup are at their end of life and a new environment (83TB) is available. We will call it and its backup device data02 for now. Next to the data01 server there was a bulk storage server data03 (34TB used) that was not backed up. Both the old data01 and data03 will be merged now to data02.
Hardware

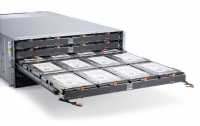
 The Storage server consist out of two elements, a server machine (Dell R630) that handles the network access, the file I/O, user and access rights and connects via fibre channel to an extension box (PowerFault MD36xx series). Between the server and the extension box a redundant pair of fibre channels is setup, with two independent interface cards that distribute the workload (load balancing). The system disk of the servers is configure RAID1 for High Availability.
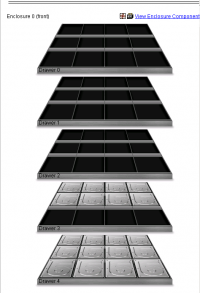
 The hardware is bought for expansion. Currently the disk extension box acquired contains 20 disks, and can easily be extended with additional disks to a total of 60 disks. So the current 83TB can be extended to about 250TB by simply acquiring more disks. When the disk cabinet is filled an additional cabinet could store an additinal 250TB of space without any major change to the hardware configuration. Extending the partition size of the shares is done dynamically, so with the addition of new physical disks you will only see that the total size of free space increases. You do not have to use a different share mapping.
The way the data is stored across the disks is in the form of Pools. This means that data is written in a redundant format across all disks simultaneously increasing write performance while making it resistant to multi disk failure. The system is configured such that it will report disk failures so system managemen can take appropriate actions. Currently, the maintenance contract is for four years, while disk replacement can be performed more or less indefinitely.
Connecting to data02
In order to save your data onto you own PI area one needs to mount the appropriate share. Above you see the avaialble share names. You only have access to the PI share you have been assigned to by system management. If you need access to other PI share, please contact the PI and system amangement.
There are two ways to connect to the shares. The simple way is from the meetnet PC or your personal desktop. Alternatively you can connect to these shares using an ass tunnel. Both methods are described below.
From your desktop
 To mount the PI share on your desktop, go to the Computer icon on your desktop or select
 Start->Computer from the windows bar to open Windows Explorer. Click on the Map newtork drive to open the network mapping utility. If you do not see the Map newtork drive option in the top bar, press the Left ALT key to show this bar. Once the Network Mapping utility is opened, select a drive letter and for the Folder type:
\\data02.physics.leidenuniv.nl\pi-xxxx
where xxxx is the name of your PI. Select both the Reconnect at login and Connect using different credentials options. Click on Finish to continue the mounting.
You will be presented an Authentication windown on which you have to slecify as username: PHYSICS\yourname amd of course your own password. Then click OK to finish the mounting process.
Alternatively you can use the mount folder: \\data02.physics.leidenuniv.nl\ to mount the top level. To be ale to write, you then need to go into the correct PI folder.
From your laptop or at home
Local machine we can trust, but your personal laptop or your machine at home may be connected from Internet so you need to build a tunnel to see the files on the data storage device. The best program, and most easy way, to do this is calle WinSCP (Windows secure copy). Get your copy at the WinSCP site. Once installed you start the WinSCP program and setup the connection to the data02 server:
 Type in the FQDN (Full Qualified Domain Name) of the server:
 data02.physics.leidenuniv.nl and use your username and password to authenticate. Click on the Logon button and you will be connected at the top level of the directory tree:


